- 36 Views
- 11 Min Read
- (0) Comment
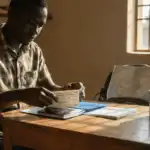
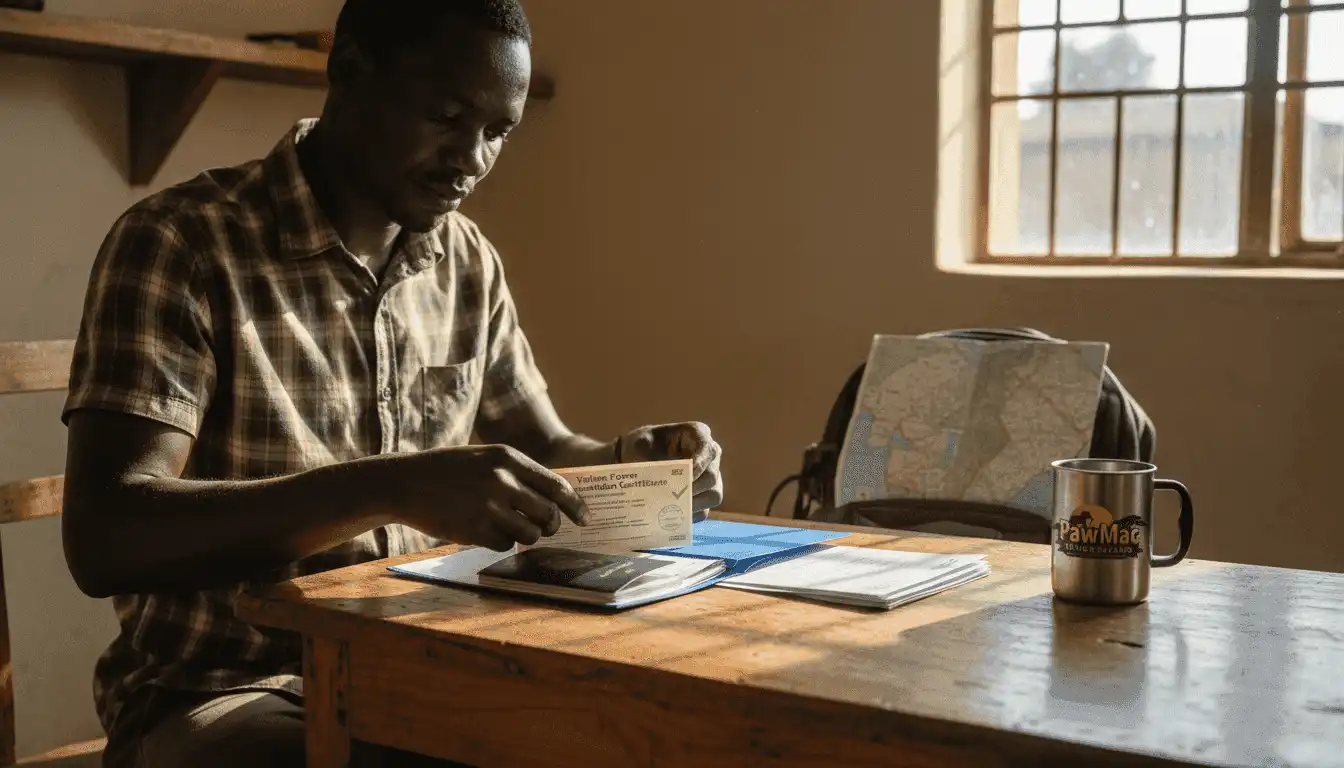
Applying for a Uganda visa can feel overwhelming when your wildlife adventure hinges on paperwork. Eco-conscious travelers planning a safari or gorilla trek in Uganda must carefully gather documents like a valid passport, recent photograph, and a Yellow Fever Vaccination Certificate. Without these essentials, entry is denied and itineraries are ruined. This guide gives you clear steps to collect, organize, and submit everything so your journey starts with confidence and no unexpected setbacks.
Table of Contents
- Step 1: Gather Required Travel Documents
- Step 2: Complete the Online Visa Application
- Step 3: Submit Payment and Supporting Papers
- Step 4: Verify Visa Approval and Entry Requirements
Quick Summary
| Key Point | Explanation |
|---|---|
| 1. Gather required documents early | Collect documents like your passport and health certificates upfront to avoid application delays. |
| 2. Accurate online application details | Fill out the application form carefully with personal info that matches your passport to prevent rejections. |
| 3. Verify payment and document uploads | Ensure all supporting documents are clear and payment details are accurate to avoid processing issues. |
| 4. Monitor application status | Use your unique application ID to track the progress of your visa application online. |
| 5. Bring essential entry documents | Have your Travel Authorization letter, passport, and vaccination proof ready for Uganda’s immigration process. |
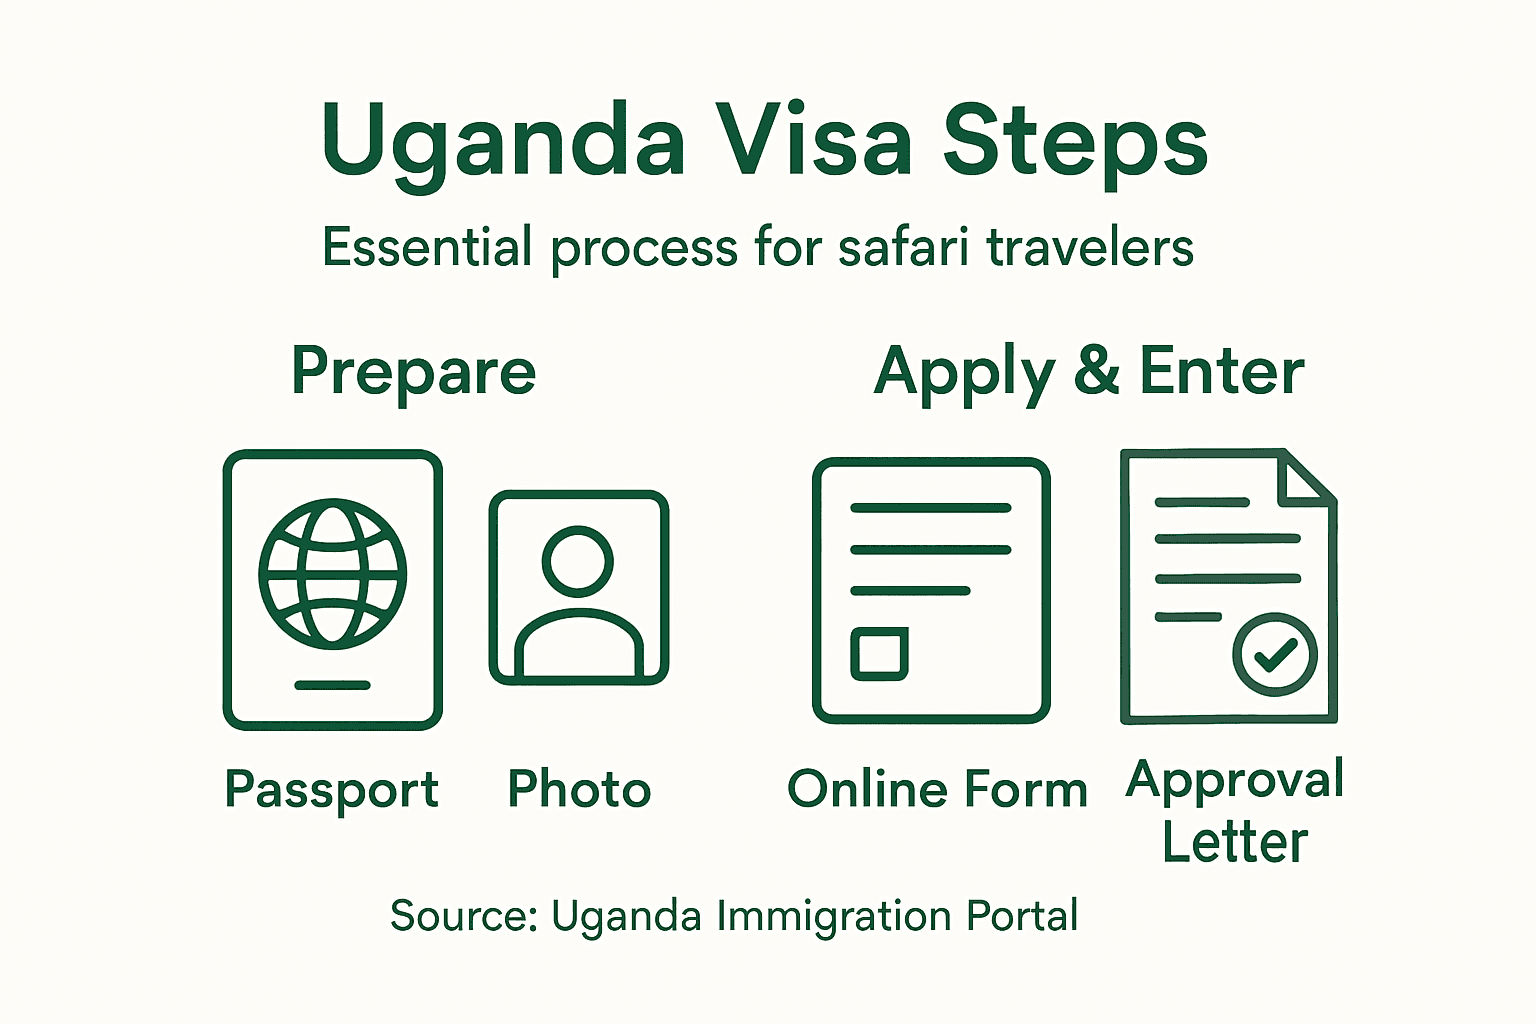
Step 1: Gather Required Travel Documents
Before you can apply for your Uganda visa, you need to collect several essential documents. Having everything ready upfront prevents delays and rejection letters. This step takes time but saves frustration later.
Start with your passport. It must be valid for at least six months beyond your planned departure date from Uganda. Check the expiration date carefully—many travelers discover too late that their passport expires sooner than they thought. If your passport is expiring soon, renew it before applying for the visa.
Next, you’ll need a recent passport-sized photograph. This is typically 2×2 inches or 35×35 millimeters. The photo must show your face clearly against a plain background. Most photos taken in the last six months work fine, but verify it meets standard requirements when you take it.
You must provide proof of your health status through a Yellow Fever Vaccination Certificate. This isn’t optional—Uganda requires it for entry. Get vaccinated at least 10 days before your trip so your body builds immunity. The certificate becomes your official proof and must be included with your visa application.
Beyond these core documents, supporting documents for your visa category will be necessary. For safari travelers, this typically includes proof of your travel itinerary and hotel bookings. Some applicants may need a police clearance certificate depending on their circumstances.
Create a simple checklist of everything you’ve collected:
- Valid passport (minimum six months validity)
- Recent passport-sized photograph
- Yellow Fever Vaccination Certificate
- Hotel reservations or safari booking confirmation
- Travel itinerary showing dates and destinations
- Any additional documents required for your specific visa type
Keep these documents in a dedicated folder. Take clear color copies of each one—you may need extras for the application process or as backups.
Here’s a summary highlighting common application pitfalls and how to prevent them:
| Potential Issue | Impact on Visa Process | Prevention Tip |
|---|---|---|
| Passport expiring soon | Application rejected | Renew passport before applying |
| Blurry document scans | Delays due to resubmission | Scan in high resolution, double-check |
| Name mismatch (form vs. passport) | Payment failure or denial | Enter info exactly as in passport |
| Missing Yellow Fever certificate | Denied entry at the border | Obtain certificate at least 10 days ahead |
| Wrong visa type selected | Processing delays or rejection | Confirm correct category before submitting |
Gathering documents early gives you time to address any missing items without rushing, which significantly reduces application rejections.
Pro tip: Scan all your documents to your phone or cloud storage before traveling—if originals are lost or damaged, you’ll have digital copies to resolve the situation quickly with your embassy or consulate.
Plan Your Uganda Safari with Local Experts
Step 2: Complete the Online Visa Application
Now that your documents are ready, you’ll navigate the Uganda Electronic Visa System to submit your application. This is where you officially enter your personal and travel information into the system. The process is straightforward if you follow each step carefully.

Head to the official Uganda immigration portal and log in or create an account if you’re a first-time applicant. You’ll need a valid email address to receive updates about your application status. Keep this email accessible throughout the process.
Once logged in, select your visa type. The system asks you to choose between a visa or permit, then specify your category. For safari travelers, this is typically a tourist visa. Be precise here—selecting the wrong category can delay your entire application.
The application form requests your personal details accurately. Fill in your full name, date of birth, passport number, and contact information exactly as they appear in your passport. Any discrepancies between your form and documents will trigger a rejection.
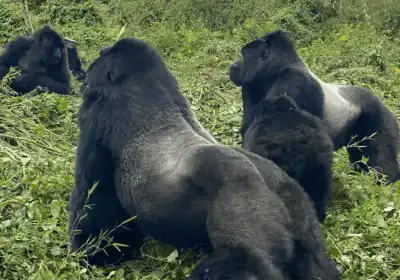
Next, provide your travel details. Enter your planned arrival and departure dates, intended destinations in Uganda, and purpose of visit. If you’re doing gorilla trekking in Bwindi or visiting Murchison Falls, specify these in the details section. Be honest about your itinerary—immigration officials can verify bookings.
Here’s what you’ll complete in order:
- Select visa type and category
- Enter personal information from your passport
- Provide travel dates and destination details
- Upload required supporting documents
- Review all information for accuracy
- Submit the application
When you reach the document upload section, attach your scanned passport copy, photograph, and Yellow Fever Vaccination Certificate. Make sure files are clear and in accepted formats like PDF or JPG. The system will generate a unique application ID once you successfully submit. Save this ID immediately—you’ll use it to track your application status.
Double-check every field before submission because corrections after submission require contacting the immigration office directly.
Pro tip: Fill out the form in a text editor first, proofread it carefully, then copy and paste into the online form to catch errors before official submission.
Step 3: Submit Payment and Supporting Papers
You’re nearly there. This step finalizes your application by uploading all documents and paying the visa fee through the secure portal. Once completed, your application enters the processing queue.
Before you pay, verify that all your supporting documents are scanned and ready. You’ll need clear, readable copies in PDF or JPG format. Blurry or poorly scanned documents will be rejected, forcing you to resubmit.
Prepare these documents for upload:
- Passport bio-data page (first page with your information)
- Yellow Fever Vaccination Certificate
- Passport-sized photograph
- Hotel reservation confirmation
- Flight itinerary or booking confirmation
- Any additional documents specific to your visa category
Once you’ve uploaded all documents successfully, you’ll proceed to the payment section. Visa fees are payable online through the secure portal using a credit card or PayPal. The payment amount depends on your visa type and processing speed.
Understand the payment terms before you submit. Fees are typically non-refundable, even if your application is denied. You may also see bank charges added by your card issuer or payment processor. These extra fees are your responsibility, not the immigration office’s.
Enter your payment information carefully. Use the same name on your payment card as appears in your passport. Mismatches can cause payment processing errors and delay your application.
Here’s the final sequence:
- Upload all scanned documents in clear formats
- Review document uploads for completeness
- Proceed to payment section
- Enter payment details accurately
- Submit payment through secure gateway
- Receive confirmation and receipt number
Once your payment is confirmed and documents are verified, your application officially begins processing. The system will email you a confirmation with your application status and expected decision date.
Payment confirmation is your proof that the application is in the system, so keep your receipt and confirmation email for your records.
Pro tip: Pay during business hours so if there’s an issue, you can contact the immigration office immediately rather than waiting until the next day.
Step 4: Verify Visa Approval and Entry Requirements
After submitting your application, the waiting period begins. You’ll receive updates through email, and you can check your application status anytime using your tracking number. This step ensures you’re prepared when approval arrives.
Log into the immigration portal and enter your application number to monitor progress. The status updates as your application moves through review stages. Most tourist visa applications process within 5 to 10 business days, though times vary.
When your visa is approved, you’ll receive an email with your Travel Authorization letter. This is not a physical visa stamp in your passport. Instead, it’s your electronic approval that proves you’ve been vetted by Ugandan immigration.
Visa approval validity lasts three months from the issue date. You must enter Uganda before this expiration or you’ll need to reapply. Plan your travel dates accordingly.
Download and print your Travel Authorization letter immediately. Bring it with you on your flight and present it at Uganda’s port of entry along with your valid passport. Immigration officials will verify your documents and issue you entry into the country.
This table outlines key documents and when they are required during the Uganda visa process:
| Document | When Needed | Purpose in Visa Process |
|---|---|---|
| Passport (min. 6-month validity) | All stages | Identity and entry eligibility |
| Passport-sized photo | Application & border entry | Personal identification |
| Yellow Fever Vaccination Certificate | Application & border entry | Health compliance |
| Hotel or safari booking proof | Application & border entry | Proof of accommodation |
| Travel itinerary | Application review | Verification of travel plans |
| Printed Travel Authorization letter | Border entry | Proof of visa approval |
Understand this critical point: approval does not guarantee entry. Border officials conduct additional verification at arrival and can refuse entry if you don’t meet Uganda’s entry requirements.
Before you travel, confirm you have these requirements covered:
- Valid passport with minimum six months validity remaining
- Printed Travel Authorization letter from your visa approval email
- Yellow Fever Vaccination Certificate (original or copy)
- Proof of accommodation in Uganda
- Return flight confirmation
- Sufficient funds for your stay
Double-check your passport expiration date one final time. If it expires within six months of your planned departure, renew it before traveling. Many travelers discover this issue at the airport.
Your Travel Authorization letter is your entry ticket to Uganda, so protect it like you would your passport and keep a backup copy stored separately.
Pro tip: Take a photo of your Travel Authorization letter on your phone in addition to printing it, so you have a digital backup if the printed copy is lost or damaged during travel.
Simplify Your Uganda Safari Journey with PawMac Safaris
Navigating the Uganda visa process can seem overwhelming with all the travel documents, precise application steps, and timing details required to secure your Travel Authorization letter. If you want to avoid delays, last-minute frustrations, and potential visa pitfalls, then expert guidance and a trusted safari operator make all the difference. PawMac Safaris specializes in creating seamless experiences focused on authentic wildlife safaris and gorilla trekking adventures in Uganda and beyond.
Discover how our personalized safari packages not only open doors to Uganda’s stunning destinations like Bwindi Impenetrable National Park and Murchison Falls but also help you stay informed about key entry requirements, itinerary planning, and local travel logistics. Ready to transform the complexities outlined in the “Uganda Visa Process Guide for Safari Travelers” into a worry-free adventure? Explore our tailored tour offerings today at our safaris and take confident steps toward your next East African journey. Detailed travel advice and support are just a click away to ensure your dream safari becomes reality.
Frequently Asked Questions
What documents do I need to apply for a Uganda visa for safari travel?
You will need a valid passport, a passport-sized photograph, a Yellow Fever Vaccination Certificate, and proof of hotel reservations or safari bookings. Collect these documents ahead of time to avoid delays in the application process.
How can I complete the online visa application for Uganda?
To complete your online visa application, visit the official Uganda immigration portal and create an account. Fill out the required fields with accurate information from your passport and upload the necessary supporting documents before submitting your application.
How long does it take to process a Uganda visa for safari travelers?
The processing time for a Uganda tourist visa typically ranges from 5 to 10 business days. To ensure you receive your visa before travel, apply at least a few weeks in advance of your trip.
What should I do if my Uganda visa application gets rejected?
If your Uganda visa application is rejected, carefully review the rejection notice for any specific reasons. Address the issues mentioned, gather additional documentation if necessary, and consider reapplying as soon as possible to avoid travel disruptions.
How do I verify my Uganda visa approval and what do I need for entry?
You can verify your Uganda visa approval by logging into the immigration portal using your application number. Once approved, print out the Travel Authorization letter along with your passport and required health documents for entry at Uganda’s port of entry.
Is the Yellow Fever Vaccination Certificate mandatory for entry into Uganda?
Yes, the Yellow Fever Vaccination Certificate is mandatory for entry into Uganda. Get vaccinated at least 10 days prior to your trip to ensure you have the required certificate when applying for your visa.
Recommended
- Uganda Safari Guide: Gorilla Trekking, Wildlife & Planning
- Uganda Safari Packing Guide for Gorilla Treks and Big Five
- 8 Family Safari Packing Checklist Must-Haves for Uganda
- Explore Adventure Stories and Tips on the PawMac Safaris Blog